Avoiding and Getting Rid of Distortion, Warping and Slumping Metal Clay by Holly Gage
- Holly Gage
- May 13, 2021
- 10 min read

Photo by Annemarie Klappe
There is really no time during the creative process where you want the shape of your Metal
Clay piece to change in shape. It could happen in the drying stage or the firing stage, so when it’s not planned it can be just plain frustrating.
As a creator, rarely do we walk a straight line to success, we take detours, we trial, we error, and we come to new conclusions on how to do things. With that in mind, let’s look into the factors that cause these distortions and discuss methods for avoiding them on the front end of creating or fixing them on the backside if you encounter a problem.
Click the picture to download the Free Tutorial ----------->
Warping in the Greenware Stage

The contents of Metal Clay are nano particles of metal, water, and an organic binder. After shaping the Metal Clay you need to completely dry it to remove the water before firing it with a torch or a kiln. The drying process is one place where warping can take place. Drying should happen evenly and gradually. A medium to medium/high setting is best. A very high and fast-drying method will require you to babysit the piece for possible warping.
Even Drying on a Cup Warmer or Hotplate

Flipping the piece every so often on the heat source will prevent the warping and curling of Metal Clay. Because you are speeding up the evaporation of the water, it should be removed evenly on all sides. A minute or two depending on the thickness should do it. Wait for it to stiffen up so as not to distort or stretch it. This is definitely not a set it and forget it process. Once you flip the piece, it should be ok to let it dry the rest of the way.
Dehydrator

A dehydrator works well because it circulates air around the piece, so you don’t have to flip it. The Metal Clay piece should sit directly on the aerated shelf of most dehydrators versus on a tough card or another surface that prevents the air from contacting it. My dehydrator has deep-cut shelves so plastic mesh purchased at a craft store in the sewing department is another option as a surface to put it on.
Open-air Drying
This method is for those who have more patience than I because it takes up to 24 hours to dry depending on the size, however, it still needs to be flipped as well. Any surface in contact with the clay prevents that side from receiving air to dry.
Oven
You can use an oven, dedicated to crafts only. Keep it to 175 - 180º F especially if you want to continue working on the piece. A high setting could make it hard and stiff, which I find difficult to sand properly or carve.
How to Fix a Warped Piece in the Greenware Stage?
For Subtle Warping
I learned this trick from Donna Penoyer in one of my classes. Cup your hands around your piece and huff on it. The moisture of your breath should be enough to place it on the table and press GENTLY with your fingers. Don’t force it, and if you have to huff again go right ahead.
Homemade Humidor

Make a mini humidor using an airtight container that has a wet sponge in the lid, or a container that is spritzed with water on the lid. Put the piece inside for 30 – 40 minutes or more depending on the thickness. As the piece absorbs the humid air try testing it to see if it is ready to be flattened out. Again, don't force it, and put it back in if it needs more time. This secret weapon is a great fix for subtle warping or even if you desire to change the shape a bit without ruining the texture or integrity of the shape. What I like about this method is you can straighten out the piece without making it physically wet with water potentially muting or ruining the texture. (Watch my video: “How Do I Rehydrate, Reshape, or Fix Warped Greenware Metal Clay?”)
Warping While Torch Firing
After firing Fine Silver Metal Clay with a torch, you may notice it no longer lies flat even though it was flat before firing.
Warping often happens if the flame is not circulating evenly over the piece and is concentrated for too long in one part of the piece than the other. Be reminded a torch fired piece should be 25 grams or less as larger pieces suffer this, even more, not to mention insufficient sintering. Find more tips on torch firing with my blog post and video: “Breaking the Ice: Torch Firing Fine Silver Metal Clay,”
Flattening a Fired and Warped Piece of Metal Clay with a Mallet

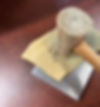
When there is subtle warping during the torch firing or kiln firing, place your piece on a bench block and sandwich the base between leather and hammer flat with a rawhide or plastic mallet. My bench block is steel and the leather protects the Metal Clay piece from flattening out. The leather on the top of the piece protects it from the mallet, even though they are made from softer materials than metal, soft Metal Clays like Fine Silver can be marred. Hang any bails or protruding elements off the edge of the bench block to avoid flattening it. To flatten tiny areas between embellishments use a softwood dowel rod with your hammer to tamp it down.
Slumping and Warping in a Kiln
Why oh why do you get slumping or warping of a Metal Clay piece in the kiln after spending hours or days creating it? This happens sometimes due to the intense heat and gravity. You can also get warping when you have complex dimension or more Metal Clay in one area than another such as layered elements. This is because there is more mass in that area. Also, adding elements that don’t shrink, a cluster of gems in one area, manufactured findings, or bezel wire. There are definitely things you can do to eliminate or minimize these effects, however, solutions from supporting it better in the kiln, hammering after firing, or multi-part firings.
Avoiding Horizontal Distortion

Many people place a flat piece right on the kiln shelf and there is no distortion at all. But long or heavy pieces may experience drag — drag is when the piece is prevented from moving freely as it shrinks. To prevent this, sprinkle vermiculite on the kiln shelf or fire on kiln paper. Kiln paper is usually used for preventing glass from sticking to the shelf, but both of these items are great for allowing a Metal Clay piece to slide freely while shrinking.
Support Media in the Kiln to Avoid Slumping
Dimensional pieces should be well supported in the kiln while firing. I use vermiculite versus alumina hydrate or kiln blanket as they are toxic to use. Position your piece where gravity is of least resistance. Each case needs to be analyzed for it’s individual characteristics, but in general heavy parts usually facing down.
Lentils (), submerge the point down burying in the vermiculite versus on its belly.

A concave or convex piece would be shimmied into the vermiculite dome side down.
Rings with no embellishment would lay horizontally on a kiln shelf in vermiculite.
Rings with large tops would go upside down vertically buried into the vermiculite.
Flat pieces with a protruding bail would need the vermiculite to be flattened and then the piece shimmied into place.
Large or Tall tubular pieces need to be buried vertically. Remove most of the vermiculite, add the piece, and allow the vermiculite to loosely be placed around or inside it.
Two-Part Firing to Avoid Warping

You can avoid distortion with a 2-part firing on multi-dimensional pieces, this means if each Metal Clay part has been pre-fired, shrinkage has already taken place, so connecting them together after firing will help you to avoid the distortion of uneven mass distribution. This is also true for adding prefabricated metals to your work like sheet metal or wire. I use this technique for adding bezel wire in both my Romancing the Stone: Reverse Bezel Setting and Bezel Setting Like a Pro classes.
When adding an element after a piece has been fired you can use Metal Clay lump with Pastemaker® or Metal Clay slip with lavender added or Art Clay® paste type which is formulated for both greenware and fired connections. Strength and durability are important, and so the right clay body and technique for the connection should be understood or the result could be quite weak. Let’s take a look at your options.
Fired Metal Clay to Fired Metal Clay – Big Additions and Complex Design
When the pieces are large and/or more complicated, or the addition gets lots of wear and tear such as a jewelry bail, use lump Metal Clay with PasteMaker® for the attachment. The PasteMaker® allows the lump to stick nicely to the fired Metal Clay without effort, plus there is no pull away or separation along the joined area after firing the Metal Clay ONLY if sanded appropriately beforehand. PasteMaker® works great in combination with the viscosity of the clay. Others use lavender oil with their Metal Clay in the same way and claim a similar effect.
Start with 2 fully fired Metal Clay pieces at the highest firing schedule for maximum strength, and shrinkage to avoid distortion.
Sand the contact areas to be attached including the area just next to it allowing space to feather in excess clay for a seamless connection.
Mix a bit of PasteMaker® into your Metal Clay to make a slip.
Coat the contact areas with the slip.
Next, add a drop or 2 of the PasteMaker® to your lump clay and knead it through the clay in plastic wrap. Then use the lump clay to make the connection.
After it dries go back and blend the transition points with the PasteMaker® on a brush or shaper tool for a seamless connection.
Refire in vermiculite, in the kiln at the clay’s highest temperature.
Altering Kiln Temperature to Avoid Warping
Ramp
I think one of the conclusions you can infer is even heat and temperature can cause slumping and warping in all stages of working with Metal Clay. Slowing up your kiln may help. A ramp added to the programming is used to slow down your kiln, so it doesn’t hit the target temperature too quickly. A ramp is defined by how long your kiln will take to rise to a given temperature over an hour.
To add this extra segment to your kiln program, you may want to ramp to a lower temperature than the sintering temperature of your clay. Let’s say your target temperature is 1650º F, you may choose to set the ramp at 1350º F. This means the kiln will slowly rise to the 1350º F over an hour, then it will proceed to go as fast a possible to your target temperature of 1650º F.
See my blog post “Breaking the Ice: Kiln Firing Fine Silver, 950 & 960 Metal Clay” for more about setting the ramp speed and programing your kiln.
Changing Kiln Temperature
If you know me, you know I am not a fan of short firing — lowering the temperature from maximum strength temperatures. There are exceptions to the rule, which I won’t cover here, but I have seen the suggestion to lower the temperature to avoid slumping and warping. I’m not a fan of this solution. I’d rather do things in a more complex way if need be than compromise the strength by lowering the temperature.

Shaping Metal Clay After Firing
After a few select curse words, it’s time to use that frustration and muscle to good use and fix warpage. Get the hammer!
Not any hammer, your plastic and rawhide mallet. We talked already about fixing flat pieces or flat pieces with a protrusion under “Warping while Torch Firing” above, but how about those dimensional pieces. For shaping, you need an item that echoes the shape you desire. If you don’t have jewelry mandrels made of wood or steel, you may need to get creative. If it has a hard or steel surface remember to protect your Metal Clay piece by sandwiching it in leather if need be.
Rings can be slid onto a ring mandrel and tapped gently with a mallet.
Bracelets can be slid onto a bracelet mandrel and tapped into shape as well.
Concave or Convex items should be tapped back into shape with a mushroom stake or doming block.
Anvils work great for varied shapes. They come in all sizes. I work small so mine is miniature in size.
Word of Caution: If your Metal Clay is not fired at maximum strength, you “may” get away with fixing subtle slumping by tapping with a mallet, but any serious metal movement will result in a broken piece and you will need to fix it with a fired to fired connection mentioned above.

• • • • • • • • • • • • • • • • • • • • • • • • • • • • • •
Live Online Class for ALL Abilities
I’m adding Jewelry classes regularly with small, live, interactive, online group sessions. Simply great connectivity with other artists during this pandemic, and tons of learning. Click here for details or click on the Class Title

Thursday, June 10 - August 12, 2021
1:00 PM- 2:30 PM EDT
(6:00 pm GMT, 12:00 pm CDT, 11:00 am MDT, 10:00 am PDT) (10) week group sessions • 90 min. Live & Interactive on Go to Meeting
All levels of ability
________________________________________________________

Bezel Setting Like A Pro 3 Spots
Tuesday, June 1 - June 22, 2021
6:00 PM- 7:00 PM EDT
(10:00 pm GMT, 5:00 pm CDT, 4:00 pm MDT, 3:00 pm PDT)
4) week group sessions • 60 min. Live & Interactive on Go to Meeting
All levels of ability
________________________________________________________

Innovative Prong Solutions in Metal Clay (2 Spots) Monday, June 7, 14, 21 (skip 28, 5) July 12, 19, 26
1:00 PM- 2:30 PM EDT
(6:00 pm GMT, 12:00 pm CDT, 11:00 am MDT, 10:00 am PDT) (6) week group sessions • 60 min. Live & Interactive on Go to Meeting All levels of ability
________________________________________________________

Peruvian Style Applique Jewelry (4 Spots)
Wednesday, June 16 - July 7, 2021
6:00 PM- 7:00 PM EDT
(10:00 pm GMT, 5:00 pm CDT, 4:00 pm MDT, 3:00 pm PDT)
4) week group sessions • 60 min. Live & Interactive on Go to Meeting
All levels of ability
________________________________________________________

(4 Spots) Tuesday, July 6- August, 3 2021
1:00 pm - 2:00 pm EDT
(6:00 pm GMT, 12:00 pm CDT, 11:00 am MDT, 10:00 am PDT)
(5) week group sessions • 60 min. Live & Interactive on Go to Meeting
________________________________________________________

(4 Spots) Tuesday, July 6 - August 3, 2021
6:00 PM- 7:00 PM EDT
(10:00 pm GMT, 5:00 pm CDT, 4:00 pm MDT, 3:00 pm PDT) (5) week group sessions • 60 min. Live & Interactive on Go to Meeting
All levels of ability
• • • • • • • • • • • • • • • • • • • • • • • • • • • • • •
Looking for the beauty, depth, and flash of Opals?
Christopher's artisan cut Cultured Opals are 2-sided and ignite the imagination. Take a sneak peek as to what he will be offering this Friday from from 10 AM - 10 PM EDT on Christopher Gage's Facebook Page


